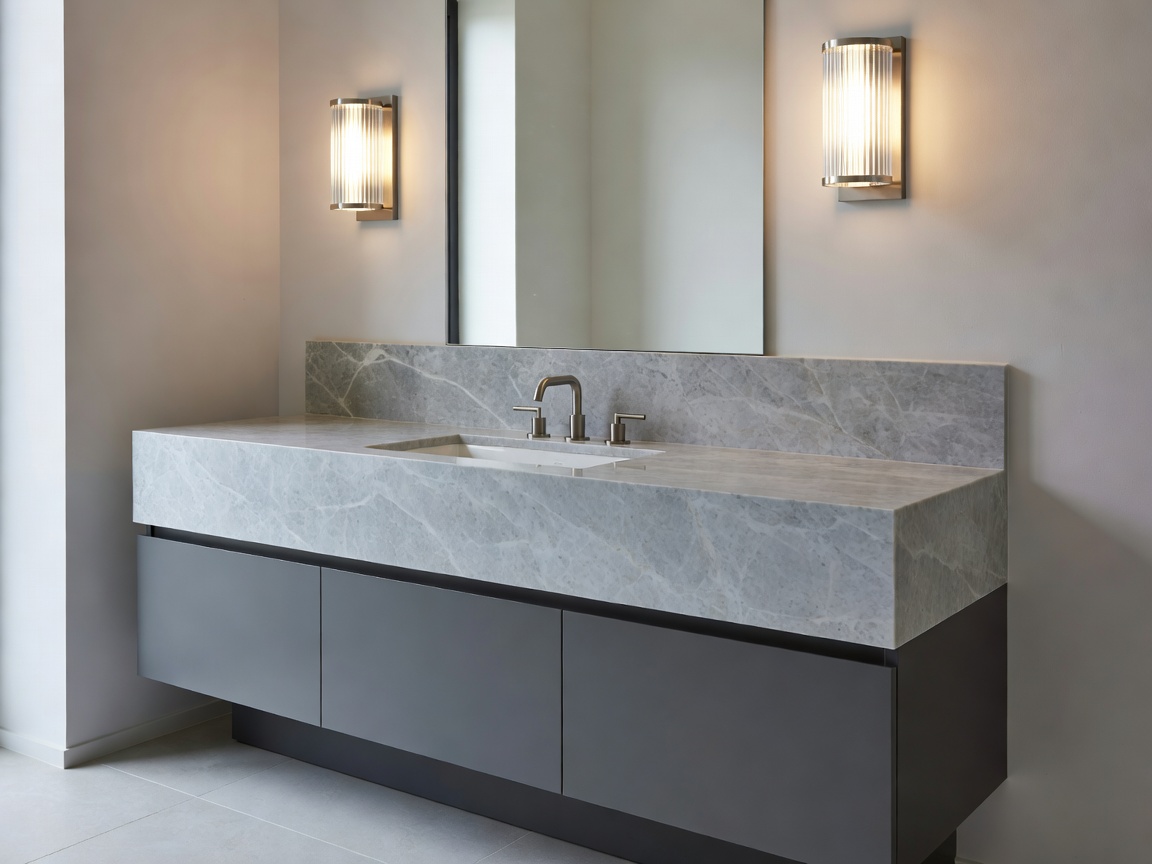
A bathroom vanity makeover is one of the highest-impact interventions in domestic renovation. However, bathrooms present complex technical challenges: high relative humidity, direct water splash zones, strict building regulations, and precision grooming lighting requirements.
1. Wet-Zone Electrical Safety & Ingress Protection (IP)
Electrical fixtures in bathrooms are governed by strict spatial zones according to standard wiring regulations (BS 7671 in the UK, similar standards worldwide):
| Bathroom Zone | Physical Boundary | Minimum IP Rating Requirement |
|---|---|---|
| Zone 0 | Inside the bath basin or shower floor tray | IP67 (Immersion-proof, SELV max 12V) |
| Zone 1 | Directly above the bath or shower up to 2.25m | IP65 (Water jet protected) |
| Zone 2 | 0.6m radius outside bath/shower & sink perimeter | IP44 (Splash-proof from all directions) |
| Outside Zones | Areas beyond Zone 2 with no direct water spray | IP20 (Standard domestic, though IP44 recommended) |
2. Eliminating Facial Shadows: Cross-Illumination Photometry
The most prevalent lighting design error in bathrooms is a single downlight located directly above the mirror. Overhead downlights cast harsh downward shadows beneath the eyes, nose, and chin, making shaving or makeup application difficult.
The Solution: Flanking Vertical Sconces. Install two IP44-rated wall sconces on either side of the vanity mirror, positioned at approximate eye level (1550mm to 1650mm from finished floor level). The horizontal separation between sconces should ideally sit between 650mm and 800mm. This delivers balanced, cross-directional light across the face.
Always specify high color rendering index LED modules (CRI 90+ or Ra > 90) with a neutral warm spectrum (2700K–3000K). Lower CRI lamps (under 80) wash out skin tones and distort natural cosmetic shades.
Mirror Heating & Defogging Mats
When replacing your vanity mirror, install an ultra-thin 12V/230V silicone heating pad behind the glass tied directly to the vanity light switch. This prevents steam condensation after showers without noisy extraction fans.
3. Floating vs. Freestanding Vanity Structural Tolerances
Floating (wall-hung) vanities create an open feeling and allow seamless tile continuity underneath, but they exert heavy cantilever forces on wall framing.
- Structural Stud Blocking: Never mount a wall-hung vanity onto plasterboard alone. Install horizontal 50mm x 100mm timber noggins between wall studs at the vanity anchor height prior to tiling.
- Drainage Waste Rough-In: Freestanding units hide floor-level waste pipes inside the kickboard. Wall-hung units require the waste pipe to exit horizontally through the wall at approximately 450mm–500mm above finished floor level.
- Countertop Ergonomics: Modern vanity heights have shifted from the traditional 800mm to a comfortable 860mm–900mm, significantly reducing lower back strain during daily use.
Undermount Sinks
Maximizes usable countertop surface, wipes clean effortlessly with no silicone rim to collect grime, requires stone or quartz slab fabrication.
Above-Counter Vessel Bowls
Creates a striking focal point with lower fabrication costs, but requires taller vessel faucets and careful calculation of overall rim height.
4. Anti-Microbial Sealants & Moisture Barriers
When sealing the perimeter between vanity tops, backsplashes, and tiled walls, always use high-modulus, 100% sanitary silicone containing active fungicides. Standard decorator acrylic caulk degrades rapidly when exposed to soap residue and moisture, developing dark mold lines within months.